Keeping the house, the kids and the hubby without breaking the bank, the earth, the people I love, or myself.
Showing posts with label what's for dinner. Show all posts

Turkey Leftovers?

Turkey leftovers are good for about 4 days in the refrigerator.  After that, they need to go.  Anytime I have more than I think can be used in that time-frame, I dice it and freeze in 2 cup portions for using in recipes like the ones in this blog post.

There are so many things you can do with turkey leftovers.  Aside from the standard cold turkey sandwiches, which I love, you might like to try a casserole. 

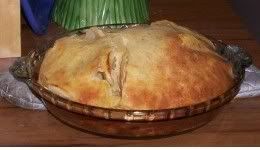
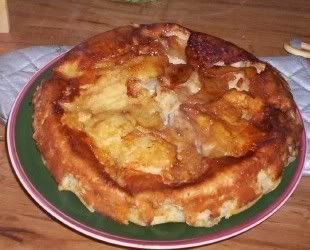
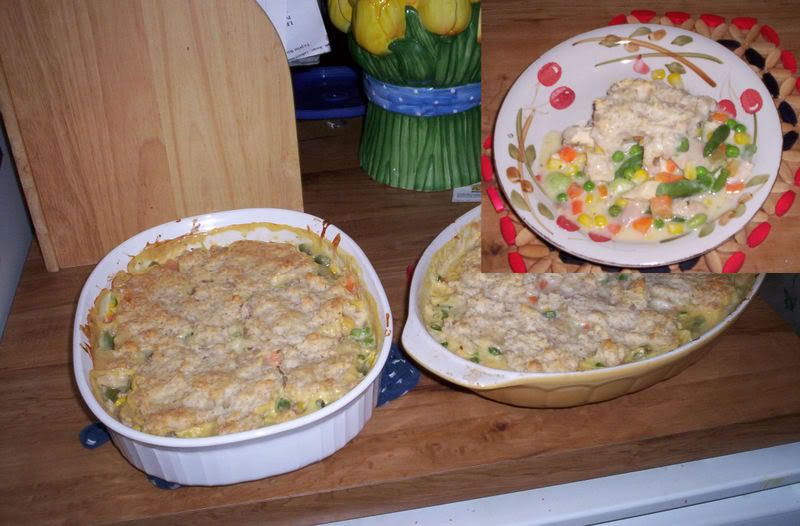
Take a look at my Chicken Vegetable Cobbler. Use leftover turkey instead.  There are a few variations on this, and they're all quite easy.  You need meat, thickened sauce, frozen mixed vegetables, and a topper.  Cook 30 or so minutes at 350F.  (Some might take longer than 30 minutes.  Choose from any of the following:

I use a 2 quart casserole and the quantities listed:

Meat:
1 cup to 2 cups cut up, just depends on what I have

chicken
turkey
beef

Thickened sauce:
1 1/2 cups to 2 cups

leftover gravy
canned soup (cream of mushroom, cream of celery, cream of chicken)
canned gravy (turns out to be lighter and lower in sodium than canned cream soups!)
thickened broth (broth + cornstarch mixed thoroughly.)

Topper:
1 recipe/1 can/1 mix or about 1 1/2 cups

refrigerated canned biscuit dough or croissant dough (these are the highest-in-fat choices)
Boxed mix of stuffing (here's a lazy resourceful tip:  mix the stuffing + water (omit margarine) in the package that the stuffing comes in.  Fork it on top of the casserole right out of the bag, toss the bag.  No washing up.)
Leftover or instant mashed potatoes
Leftover mashed sweet potatoes
Homemade drop or rolled biscuits (recipe for this is in my Chicken Vegetable Cobbler post)
boxed corn muffin mix (follow instructions on mix and drop by spoonful on top of casserole)

Frozen mixed vegetables:
1 1/2 cups

Standard or,
peas and carrots
broccoli blends are too strong for this casserole
You can use canned, but I find them too soft, salty, and sweet.

This casserole comes together in just a few minutes, bakes in 30-45 and really hits the spot on a cold day.  Leftovers are great for lunch! 

Read more...

And our suggestion for dinner today...a steaming pile of ...


Seriously. What the hell does that look like to you? This is the recommended recipe I received in my mailbox today from Allrecipes.com . I have scooped giant piles that look just like that from my cat box (minus the sour cream and parsley on top...or is that cilantro...I bet it's cilantro.) Honestly. And after scooping such steaming piles from the cat box, I call the vet and say, "OMG you should see what came out of my cat! Is something seriously wrong with him, or what?" (Vet had me change fatty's diet and reduce his intake because what's pictured above is what comes out of overfed kitties.)

This recipe was for an enchilada casserole. I tell ya, I've made enchilada casseroles and they don't look like steaming piles of bloody pooh on our plates.

This is what my enchilada filling looks like:

And the sauce...well the sauce doesn't look like so much heart-attack inducing slop as whatever is in that top photo (I'm thinking transfats....you?)


I'm betting you want a recipe now, don't you? Seeing as how I didn't write down anything, I'll TRY to get this right.

Rachel's Chicken Enchiladas (honestly, I ripped apart about 20 different recipes to pick and choose what I wanted in them.)

This made 2 9x13 dishes, by the way, but I was serving 8 that night & had nothing left over.

Filling

  • 2 T olive or canola oil
  • meat of 2 whole chicken breasts chopped into bite sized pieces
  • 1 can Red Kidney Beans (or 1.5 cups cooked red kidney beans)
  • 2 small or 1 large bell pepper -- colours of your choice (I like it more colourful as you can see)
  • 1 small onion
  • 5 garlic cloves, minced
  • 1 bunch cilantro
  • Small can chopped tomatoes
  • 2 cups shredded co-jack cheese (marbled cheese in Canada)
  • medium sized tortillas

Sauce
  • Large can tomato sauce
  • small jar enchilada sauce
  • 1/2 t cumin
  • 1/2 t oregano
  • 1 t Ground red pepper (we grind our own dried chili peppers for this...I'm sure cayenne or chili would work)
  • 1/2 cup red cooking wine
  • 1 T corn starch
Cook all sauce ingredients on low heat for 30-45 minutes. Sauce should be smooth and spicy. (I actually added red pepper to the "grown ups" pan -- the younger ones wouldn't be able to handle it.)

1. In large frying pan, pour oil and add chicken, onion, and garlic. Cook over medium heat until chicken is cooked through.
2. Add beans and peppers, can of chopped tomatoes, and as much of the cilantro (chopped) as you'd like. (We saved some for on top of the enchiladas and for our homemade salsa. The bunches are rather generous here.) Cook over low heat for as long as you like. I wanted the flavours to blend, so I left it on low heat until the sauce was the consistency I wanted it (thick).
3. Using a 9X13" baking dish, add some sauce to the bottom of the dish. Take one tortilla, dip it in sauce then fill the center of it with about 1T of cheese and 3T of filling. Fold the tortillas like you would a burrito. Place seam-side down in casserole dish. Do this for as many tortillas as you can fill with filling. Don't overstuff them and have filling oozing out all over.
4. Pour enchilada sauce over all the tortillas. Use all the sauce.
5. Cover with foil and bake for 20-30 minutes. You don't want the tortillas to become mushy. For the last 5 minutes of baking, remove foil and sprinkle with remaining cheese.

Serve with sour cream, if desired.

These were really very good, but a fair amount of work so they're an every-now-and-then recipe. I'll be honest and tell you that I'm pretty liberal with the spices and I'll add more when I feel I'm not getting the right blend. Use your own discretion.

Now I really wish I'd taken a picture of the enchildas after they came out of the oven, but I was so ready to dive into the suckers that they were gone before I snapped a picture. I can tell you this much: they looked NOTHING like that picture of slop at the very top of this post.

Enjoy!

Read more...

I am Loving My Rice Cooker!


My mother-in-law got me this rice cooker for Christmas and as a self-proclaimed lazy cook, I LOVE IT! The steamer basket that fits into it lets me fix a whole meal in this thing with little prep, no standing and watching, no stirring, no sticking, no burning!

Tonight's menu is Spanish Rice with steamed chicken breasts.

I diced some green and red peppers, sautéd them in the rice cooker with a bit of unsaturated margarine while I rinsed my brown rice (1.5 c dry) and measured the vegetable juice and beef broth (combined 3 cups). Then I seasoned my skinless boneless chicken breast halves (3) with my own Mexican seasoning mix. I lay several strips of green and red peppers on the steamer basket, and placed the seasoned chicken breasts on top. I stirred the sautéing peppers-- still slightly crispy, but the juices had been released to flavour the rice . I added dehydrated onion flakes (I cheat sometimes.) I added the rinsed brown rice and the vegetable juice-beef broth mixture. Then I placed the steamer basket with the chicken breasts and pepper strips on top. Pushed down the cook button and walked away. Twenty minutes later, the breasts were done, but the rice needed to cook longer. (I with there were a longer cook time option for us brown rice users!) Removed the steamer basket, placed the lid on the rice and pressed the cook button back down (after a quick stir. Old habits die hard!)

Dinner prep was less than 5 minutes. That works for me!

As for my Mexican seasoning mix, I mix a large batch of this at a time and use for seasoning taco meat, refried beans for burritos, or as above, chicken breasts.

Mexican Seasoning Mix

1/3 cup minced dried onion
1/4 cup dried Parsley
1 tablespoon chili powder
1 tablespoon cumin
2 teaspoons crushed red pepper (our own organic, homegrown)
1 teaspoon dried oregano (again, our organic homegrown)
1/4 teaspoon garlic powder (I'm not THAT good yet ;) )

That's enough for one recipe of taco meat, however you'll want to add a thickener such as cornstarch.

Read more...

Apple Puff Pancake


We almost didn't get to have this tonight. My daughter was taken to the hospital from school with chest pains and we didn't get home til almost 7PM! Turns out my daughter is fine, a little stressed apparently, but otherwise fine. It's March break next week so she'll have a chance to unwind from the rigors of the seventh grade!

Tonight's meal was so worth the wait! This is SO good! I have tried many recipes for this, but this is the one that is best! My kids were so pleased with tonight's meal. My 2-year-old was the quietest at the table he's ever been...so busy taking one bite after another!

You need:
2 T stick margarine or butter (I used soft and it was fine!)
2T brown sugar
1/4 tsp ground cinnamon
2 large eggs
1/2 cup flour (I use 1/4 whole wheat, 1/4 all purpose)
1/2 c milk
1/4 tsp salt
1-2 baking apples (I used McIntosh)Peeled, cored, and thinly sliced

Set the oven to 400F. Put the margarine in a 9" pie plate and set it inside the oven to melt the margarine. Remove the pie plate and spread the margarine over the sides and bottom of the pan. Sprinkle the brown sugar and cinnamon on the bottom of the pan. Spread the apple slices over the bottom of the pan.

Beat the eggs slightly in a medium bowl with a wire whisk. Beat in the rest of the ingredients until just mixed. Pour the mixture over the apples. Bake 30 minutes or until pancake is puffy and a golden brown colour.

Immediately loosen the edge of the pancake from the pan with a thin knife. Set a plate on top of the pie pan and carefully flip the pan and plate over. The pancake will come out onto the plate upside down. That's how you want it. If you don't flip it, you'll never get apples onto each person's plate without a struggle. Flipped, the apples and caramelized sugar mixture is on the top when served. Also, the puff deflates soon as you cut it.

Serve it as is. The kids will add syrup to it if I put syrup on the table. But they'll eat it without, too! I like it as is!

Read more...

Chicken Vegetable Cobbler


Yet another frequent flyer on my menu. This is wonderful in the winter for a one dish meal as it's hearty, warm and flavourful. This one's also an original of mine. I have several variations, but this is how I prepared it tonight:

2c cut up cooked chicken
1 can condensed cream of chicken soup
1 can condensed cream of celery soup
1/2 can evaporated fat-free milk
3 c frozen mixed vegetables
1 batch drop biscuit dough (recipe below)

I cooked two 2-quart baking dishes of this tonight. I'll freeze one for another day.

First I place the chicken, cream soups, and milk in the baking dish and stir to get the soup thinned out and fairly distributed. Then I add the mixed vegetables and stir again. It seems like a dry mixture, but the water from the frozen vegetables will moisten the mixture more as it cooks. For the biscuits:

1/2 c shortening
2 cups flour (I use 1 cup whole wheat, 1 cup all purpose)
1 T sugar (I use Splenda and nobody knows!)
3 tsp baking powder
1 tsp salt
1 c milk

Cut the shortening into the dry ingredients using a pastry blender until it resembles fine crumbs. Stir in the milk. It will be a sticky mixture. Using a tablespoon, spread one table spoon of biscuit dough at a time onto the top of the vegetable-chicken mixture. I thin these out as I've found if they're very thick used this way, they don't cook all the way through. These will not completely cover the mixture -- you'll have spaces between each biscuit.

When my husband makes this recipe, he reduces the milk to 3/4 cup and rolls out the biscuit dough to about 1/4" thickness and then places it directly over the mixture. We know I'm a lazy cook so I don't make that particular extra effort.

I bake this at 350 for 35-45 minutes until the biscuits are cooked all the way through and no longer doughy on the undersides. Allow the pan to cool for about 5 minutes before serving.

If you halve this recipe, your choice of cream soup will be fine. You don't need two different ones for a good flavour. You'll have extra biscuit dough, so just drop the leftovers by spoonful onto a baking sheet and allow them to bake next to the cobbler. They'll be done in about 20 minutes when they're a nice golden brown on the outside.

Prep time is 20 minutes. Not bad for an entire meal in one dish!

Read more...

Easy Slow Cooker Pork Chops


I love crock pot cooking! I got started with it when I was a single working mom and got sick of the low-quality 30 minute meals I'd make for us when we got home around 5:30 in the evening. It was always such a mad dash to get dinner for us, while I had a hundred other things to take care of. The crock pot became my friend. I'd start a meal cooking in the morning and come home to roasts with potatoes and carrots, whole chickens, chili, etc. It gave me more time with my children who needed and deserved as much of me as they could get since I was the only parent in their daily lives.

This recipe is similar to one I bake frequently and since that one is a family favourite, I decided to try this one out as well. I'll report tonight on its success. I modified this for a family of six:

6 1 inch thick pork chops (fat trimmed)
1/2 one large onion
3 T chicken soup base
30 ounces apple pie filling (I make my own, but a can will save you about 20 minutes' work)
3 large sweet potatoes, peeled and cut into large chunks.

While my pork chops were defrosting in the microwave, I peeled and sliced 8 medium McIntosh apples. One of my handiest kitchen gadgets has got to be my apple peeler/corer/slicer. My apple pie filling was done cooking and removed from the heat before the pork chops were done defrosting. How I make my filling: 8 peeled, cored and sliced apples, 1/4 c water 2 tablespoons brown sugar, 2 tablespoons margarine, 1 tablespoon instant tapioca granules, and cinnamon and nutmeg to cover them. Cook and stir on medium high heat until sauce thickens. I wasn't fussy on the perfection of the pie filling as it's going to practically disintegrate in the crock pot. I could have mixed it all together and put them in raw, but I wanted the flavours to blend so that they season the pork chops.

I sliced one half of a large onion and after spraying the bottom and sides of the crock pot and layered it on the bottom of the crock pot. Next I sprinkled 1/2 the soup base over the onions. Once the pork chops were thawed, I browned them lightly on the stove and lay them on top of the onions. I sprinkled the remaining soup base over the pork chops and piled the apple pie filling on top of that. This will cook on low for 4 1/2 hours, at which time I'll add the sweet potatoes. I'll lightly sprinkle the sweet potatoes with cinnamon and nutmeg because I like them like that. Then it will cook another hour and 1/2.

It's called easy, but I might have made it a bit more labour-intensive. Still, 30 minutes' prep time is as much as I do for chili or other ingredient-rich crock pot meals.

Read more...

About This Blog

Saving money. Saving graces. Raising children, husbands and, sometimes, cats. Laughing. Living. Thinking. Doing. Life in the Niagara Region of Ontario.

About Me

I am a happily married woman with four children and various cats and kittens (fosters). I love to read and my favourite authors are George RR Martin, Thomas Hardy, Raymond Carver, PD James, Kurt Vonnegut, J. K. Rowling, and Margaret Atwood. I know there are only three women in that list (and none of them American), so if you'd like to suggest some I'm willing to give them a shot! And yes, I am an American living in Canada. (Hence the nick -- CannedAm.) I like it here. There are things about the states that I miss, but my love is here and this country has things to offer that my own does not. Things that make my quality of life much better than it ever was in Ohio. Guess I'm stuck here. Though there's a nice spot in the Appalachian hills where I'd love to spend my retirement.

  © Blogger template Coozie by Ourblogtemplates.com 2008

Back to TOP